
You’ve probably heard them all. Don’t rinse pasta after cooking. Salt your water until it tastes like the sea. Room temperature eggs make better cakes. The kitchen is full of rules passed down through generations, repeated in cookbooks, and shared confidently at dinner parties. But here’s the uncomfortable truth: a lot of what we believe about cooking is either oversimplified, outdated, or just plain wrong.
I spent years following kitchen wisdom without questioning it, until I started testing these myths myself. Some held up beautifully. Others? Complete nonsense. The difference between cooking myths and cooking facts can mean the gap between a mediocre meal and something truly exceptional. Let’s separate the kitchen folklore from the actual science and technique that will make you a better cook.
The Searing Myth That Refuses to Die
If there’s one cooking myth that needs to be put to rest immediately, it’s this: searing meat does not seal in juices. I know, I know. Your favorite celebrity chef probably said it. Your grandmother swore by it. Every cooking show has repeated this line at some point. But it’s scientifically false.
When you sear meat at high heat, you’re creating a flavorful brown crust through the Maillard reaction, a chemical process between amino acids and reducing sugars. This crust is absolutely delicious and worth pursuing. But it doesn’t create some magical barrier that traps moisture inside. In fact, searing causes moisture loss through evaporation. The real reason to sear? Flavor and texture, not moisture retention.
What actually keeps meat juicy is proper cooking temperature and resting time. A perfectly seared steak cooked to 130°F and rested for 5-10 minutes will be far juicier than an un-seared steak cooked to 160°F, regardless of any supposed moisture seal. The science is clear, but the myth persists because that brown crust looks like it should be protective. Our eyes deceive us.
If you want to master the actual science behind perfect searing, roasting, and grilling, focus on heat control, surface dryness, and proper timing rather than chasing the “sealed juices” fantasy.
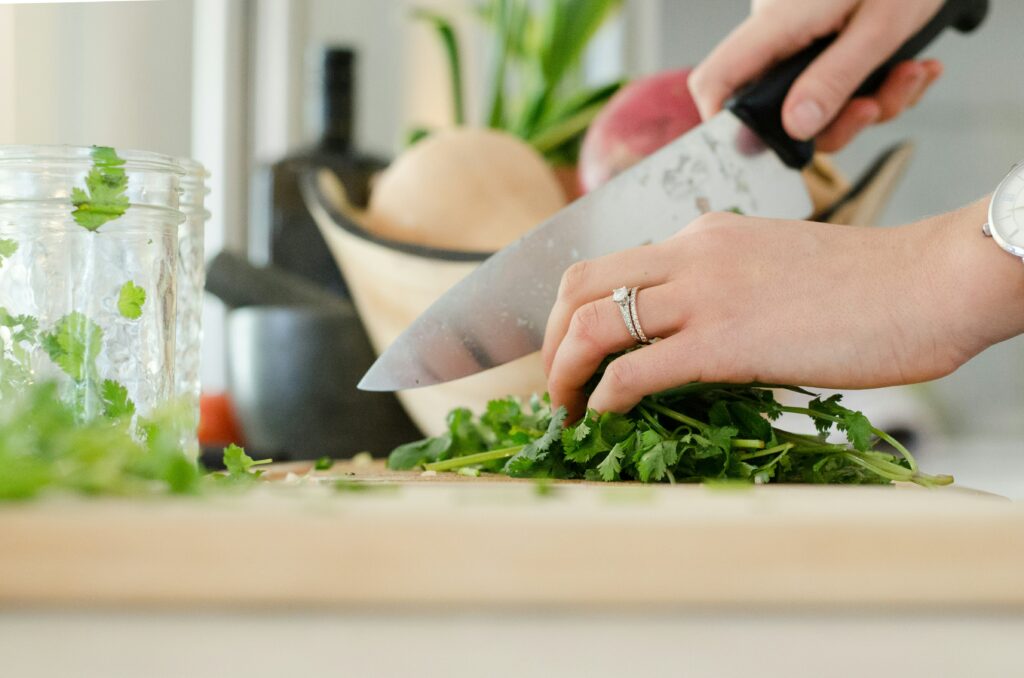
The Pasta Water Debate: How Much Salt Really Matters
Ask ten Italian grandmothers about salting pasta water, and you’ll get ten different answers. The most common advice is to make it “taste like the sea,” which sounds poetic but offers zero practical guidance. Most ocean water contains about 3.5% salt. If you actually salted your pasta water to that level, your pasta would be inedibly salty.
The truth is more nuanced. Pasta water should be well-salted, but not oceanic. A good rule is about 1-2 tablespoons of salt per pound of pasta in 4-6 quarts of water. This creates approximately 1-1.5% salinity, which seasons the pasta itself as it cooks. Unlike vegetables or meat that you can salt afterward, dried pasta absorbs seasoning during cooking. This is your only chance to season it from within.
But here’s what most people miss: the starch-rich pasta water is liquid gold for your sauce. That cloudy, salty water contains dissolved starches that help emulsify and thicken sauces, creating that glossy, clingy texture that makes pasta and sauce become one. Save at least a cup before draining.
As for rinsing pasta after cooking? Only do it if you’re making a cold pasta salad. For hot dishes, rinsing washes away both the surface starch and the seasoning you just added. It’s counterproductive.
Room Temperature Ingredients: When It Matters and When It Doesn’t
Baking recipes love to demand room temperature eggs, butter, and dairy. But do you actually need to plan your baking two hours in advance? Sometimes yes, sometimes no.
For fluffy cakes and delicate baked goods, room temperature ingredients genuinely matter. Cold butter doesn’t cream properly with sugar, which means less air incorporation and denser texture. Cold eggs can cause butter to seize up and create a curdled-looking batter. When you’re making a cake where texture is everything, take the time to let ingredients warm up.
But for many recipes, it’s overkill. Making cookies? Cold butter often works better, creating less spread and chewier texture. Mixing up quick bread or muffins? The temperature difference won’t significantly impact the final product. Pizza dough? Room temperature water is fine, but ice-cold water actually gives you more working time before yeast activation gets too aggressive.
The real skill is knowing when precision matters and when it doesn’t. Don’t let perfectionism paralyze you, but don’t ignore temperature when it genuinely affects the science of what you’re making.
The Great Oil Debate: Smoke Points and Cooking Reality
The internet has convinced people that cooking with olive oil at high heat is dangerous, toxic, or somehow ruins the oil. This myth needs serious examination because it’s causing home cooks to abandon one of the healthiest, most flavorful cooking fats available.
Yes, every oil has a smoke point, the temperature at which it begins to break down and smoke. Extra virgin olive oil’s smoke point ranges from 350-410°F depending on quality and freshness. Refined olive oil goes higher, around 465°F. For context, most stovetop sautéing happens around 250-350°F. Even medium-high heat rarely exceeds 400°F in a home kitchen.
The fear-mongering about olive oil creating toxic compounds at high heat is largely overblown for home cooking. Yes, repeatedly heating oil to its smoke point degrades it. Yes, deep frying with extra virgin olive oil is wasteful. But sautéing vegetables or pan-frying chicken in olive oil? Completely fine and actually healthier than many alternatives.
What matters more than smoke point is using fresh oil, not overheating it until it smokes, and understanding that different oils bring different flavors. Save the expensive extra virgin olive oil for finishing dishes and dressings. Use regular olive oil for everyday cooking. Use neutral oils like avocado or grapeseed when you want high heat and no flavor interference. Match the oil to the task.
Washing Mushrooms: The Moisture Myth
Food writers have spent decades warning us never to wash mushrooms because they’re “like sponges” that absorb water and become soggy. This sounds logical. Mushrooms are porous, water is wet, therefore mushrooms plus water equals disaster. Except it’s not true.
Mushrooms are already about 90% water. They’re not going to suddenly become waterlogged from a quick rinse. Food scientist Harold McGee actually tested this, weighing mushrooms before and after washing. The moisture absorption was negligible, less than 2% of their weight even after a full soak.
Here’s what actually matters: how you cook them afterward. If you crowd mushrooms in a pan, they’ll steam in their own moisture whether you washed them or not. If you give them space and cook over medium-high heat, they’ll brown beautifully regardless of a pre-wash. The real culprit behind soggy mushrooms is poor cooking technique, not a quick rinse.
That said, if your mushrooms are relatively clean, a gentle brush is faster and easier than washing and drying. But if they’re actually dirty (and some are), wash them quickly, pat them dry, and cook them properly. The moisture myth shouldn’t keep you from cleaning your food.
Adding Oil to Pasta Water
This myth probably persists because it seems like it should work. Pour oil into boiling pasta water, and theoretically, it should prevent sticking, right? Wrong on multiple levels.
First, oil floats on water. It’s not coating your pasta as it cooks. It’s sitting on the surface doing absolutely nothing until you drain the pot, at which point some oil might coat the pasta. But here’s the problem: you don’t want oily pasta. That oil coating prevents sauce from adhering properly. You’re actively sabotaging the best part of pasta, the way it grabs and holds onto sauce.
The actual solution to sticky pasta is simpler: use enough water (at least 4 quarts per pound), stir occasionally during the first two minutes of cooking, and don’t overcook it. Pasta sticks when there’s not enough water for it to move freely or when surface starches glue pieces together during those crucial first minutes. Movement and space solve the problem. Oil just creates a new one.
If your pasta is sticking after draining, the issue is either overcooking or letting it sit too long before saucing. Toss it with sauce immediately, using some pasta water to create a cohesive dish. For meal prep situations, a tiny amount of oil might prevent sticking in storage, but that’s a compromise for leftovers, not proper pasta technique.
The Truth About Resting Meat
Resting meat after cooking is good advice, but the explanation is often wrong. You’ve probably heard that resting allows juices to redistribute throughout the meat. This sounds scientific and is repeated everywhere, but it’s an oversimplification.
What actually happens is more interesting. When meat cooks, heat causes muscle fibers to contract and squeeze out moisture. The center of a steak stays relatively relaxed while the outer portions tighten up significantly. When you immediately cut into hot meat, those contracted outer muscles release their moisture all at once, flooding your cutting board.
Resting allows the meat’s temperature to equalize and the muscle fibers to relax slightly. This means the moisture stays in the meat more evenly when you cut it, not because it’s magically redistributed, but because the fibers aren’t contracting as forcefully. Think of it less like juice moving around and more like muscles loosening their grip.
How long should you rest? For steaks and chops, 5-10 minutes is plenty. For larger roasts, 15-20 minutes covered loosely with foil. The meat will continue cooking slightly during this time (carryover cooking), so account for that by pulling it from heat about 5 degrees before your target temperature.
Flavor Balancing: Beyond Salt and Pepper
Most home cooks rely on salt and pepper to fix bland food. While salt is indeed crucial, the real secret to professional-tasting food is understanding how to balance flavors using salt, fat, acid, and heat together.
A dish that tastes flat might not need more salt. It might need acid (lemon juice, vinegar, tomatoes) to brighten it. Something that seems too heavy might need acidity or fresh herbs to cut through richness. Too acidic? Add fat or a pinch of sugar to balance it out. Too sweet? Salt and acid bring it back into balance.
This is why professional chefs taste constantly throughout cooking and why they have lemon wedges and good vinegar within arm’s reach. They’re not just adding salt. They’re orchestrating a balance of tastes that makes food come alive. A squeeze of lemon on roasted vegetables, a splash of vinegar in a rich stew, a drizzle of good olive oil on a finished dish – these finishing touches transform good food into memorable food.
The myth is that salt is the only seasoning that matters. The truth is that salt is foundational, but acid, fat, and the right application of heat complete the picture. Learn to taste critically and ask yourself what’s missing. Is it flat? Add acid. Too sharp? Add fat or sweetness. Too one-dimensional? Layer in aromatics and herbs at different stages of cooking.
Garlic Burning: Prevention vs. Reality
Recipe instructions often warn: “Be careful not to burn the garlic!” But what they don’t tell you is that preventing burnt garlic isn’t about being careful. It’s about timing and technique.
Garlic burns quickly because it’s small, has high sugar content, and typically gets minced or sliced thin. When you add minced garlic to a scorching hot pan with oil, it will burn in seconds, turning bitter and acrid. The myth is that you just need to watch it carefully. The truth is that the setup is wrong from the start.
Here’s what actually works: add garlic to cold or warm oil and heat them together, or add garlic after you’ve reduced heat slightly from searing temperature. If you’re sautéing onions first, add garlic toward the end when the pan is less aggressive. If a recipe calls for high-heat cooking followed by garlic aromatics, remove the pan from heat for 30 seconds before adding garlic.
For slow-cooked dishes, whole or smashed garlic cloves are more forgiving than minced. They release flavor gradually without the burning risk. Save the minced garlic for quick-cooking dishes where you control the temperature carefully or for adding at the end of cooking.
One-Pot Cooking: Truth vs. Marketing
The internet loves one-pot recipes, promising easy meals with minimal cleanup. While one-pot wonders can absolutely deliver, the myth is that everything cooks perfectly together if you just throw it all in at once.
Real one-pot cooking requires understanding cooking times and building layers of flavor. Onions need more time than zucchini. Chicken breasts cook faster than thighs. Rice needs specific liquid ratios and timing. The successful one-pot meals add ingredients in stages, building complexity while technically using one pot.
The myth version: dump everything in, walk away, dinner is ready. The reality version: start aromatics, add proteins and sear, deglaze, add liquids and grains, simmer, add quick-cooking vegetables near the end, finish with fresh herbs. It’s still one pot, but it requires active cooking, not passive hoping.
Don’t let one-pot marketing fool you into thinking cooking doesn’t require technique. The best one-pot meals are strategic, thoughtfully sequenced, and based on understanding how different ingredients cook. They save cleanup time, not necessarily active cooking time.
Sharp Knives Are Safer: Why This Is Actually True
This seems counterintuitive. How can a sharper blade be safer than a duller one? It sounds like the kind of thing people say to justify expensive knife sets. But it’s genuinely true, and understanding why will change how you approach knife skills in your kitchen.
A sharp knife cuts where you intend it to cut, with minimal pressure. A dull knife requires force, and that force often leads to slipping. When a dull knife slips off a tomato skin or slides off an onion, it’s your hand that stops it. Sharp knives also give you better control, allowing for precise cuts that keep your fingers safely positioned.
The myth is that dangerous knives are sharp ones. The reality is that unpredictable knives are dangerous ones, and dull knives are wildly unpredictable. They require sawing motions, excessive pressure, and awkward angles, all of which increase injury risk.
You don’t need expensive knives, but you do need sharp ones. A $20 knife sharpened regularly outperforms a $200 knife that’s been neglected. Learn to use a honing steel before each use and either learn to sharpen knives yourself or get them professionally sharpened every few months. The difference in both safety and cooking enjoyment is remarkable.
Baking Myths That Hold People Back
Baking gets treated like chemistry, with dire warnings about precision and rules. Some of this is legitimate – baking does require more precision than cooking. But many baking myths create unnecessary anxiety that stops people from even trying.
Myth: You must sift flour for every recipe. Reality: Modern flour is already well-processed. Sifting matters for delicate cakes where you need maximum airiness, but for cookies, quick breads, and many cakes, simply whisking the dry ingredients together works fine. Perfect chocolate chip cookies don’t require sifted flour.
Myth: Opening the oven door ruins cakes. Reality: A quick peek in the final minutes of baking is fine. What ruins cakes is opening the door in the first 20-30 minutes when structure is still setting, or leaving it open for extended periods. A 5-second door opening near the end to check doneness won’t collapse your cake.
Myth: Baking soda and baking powder are interchangeable. Reality: They’re chemically different. Baking soda needs acid to activate and works quickly. Baking powder contains its own acid and activates in two stages (when wet and when heated). Substituting one for the other changes timing, rise, and flavor. This is one area where precision actually matters.
Myth: All ovens are accurate. Reality: Most home ovens are off by 15-25 degrees, sometimes more. Get an oven thermometer. This $10 tool will solve more baking problems than any technique adjustment. When recipes fail mysteriously, oven temperature is often the culprit.
The Takeaway: Question Everything, Test What Matters
The kitchen is full of inherited wisdom, and some of it is brilliant while some is nonsense. The trick is developing the knowledge and confidence to tell the difference. Question cooking advice, even from trusted sources. Test things yourself. Pay attention to results rather than repeating what you’ve heard.
Some rules exist for good reasons rooted in food science and technique. Salt your pasta water. Rest your meat. Keep your knives sharp. Balance flavors beyond just salt. These principles have sound foundations and will genuinely improve your cooking.
Other rules are oversimplifications or outdated advice that persists through repetition. Searing doesn’t seal in juices. Oil in pasta water doesn’t prevent sticking. Washing mushrooms doesn’t ruin them. Room temperature ingredients aren’t always necessary. Recognizing these myths frees you to cook more intuitively and effectively.
The best cooks aren’t the ones who blindly follow every rule. They’re the ones who understand the principles behind techniques, who can adapt and adjust based on what’s actually happening in their kitchen. Start questioning the cooking myths you’ve accepted without testing. Your food will be better for it, and you’ll develop the kind of cooking confidence that no recipe can provide. Cook with intention, learn from results, and trust your own experience over inherited kitchen folklore.
Leave a Reply