Decorating cupcakes can feel intimidating when you’re just starting out, but the truth is that creating beautiful, professional-looking treats doesn’t require culinary school or years of practice. With a few simple techniques and the right tools, anyone can transform plain cupcakes into stunning edible works of art that will impress friends, family, and party guests.
Whether you’re preparing for a birthday celebration, a holiday gathering, or simply want to elevate your weekend baking, these creative cupcake decorating ideas are designed specifically with beginners in mind. Let’s explore approachable techniques that deliver impressive results every time.
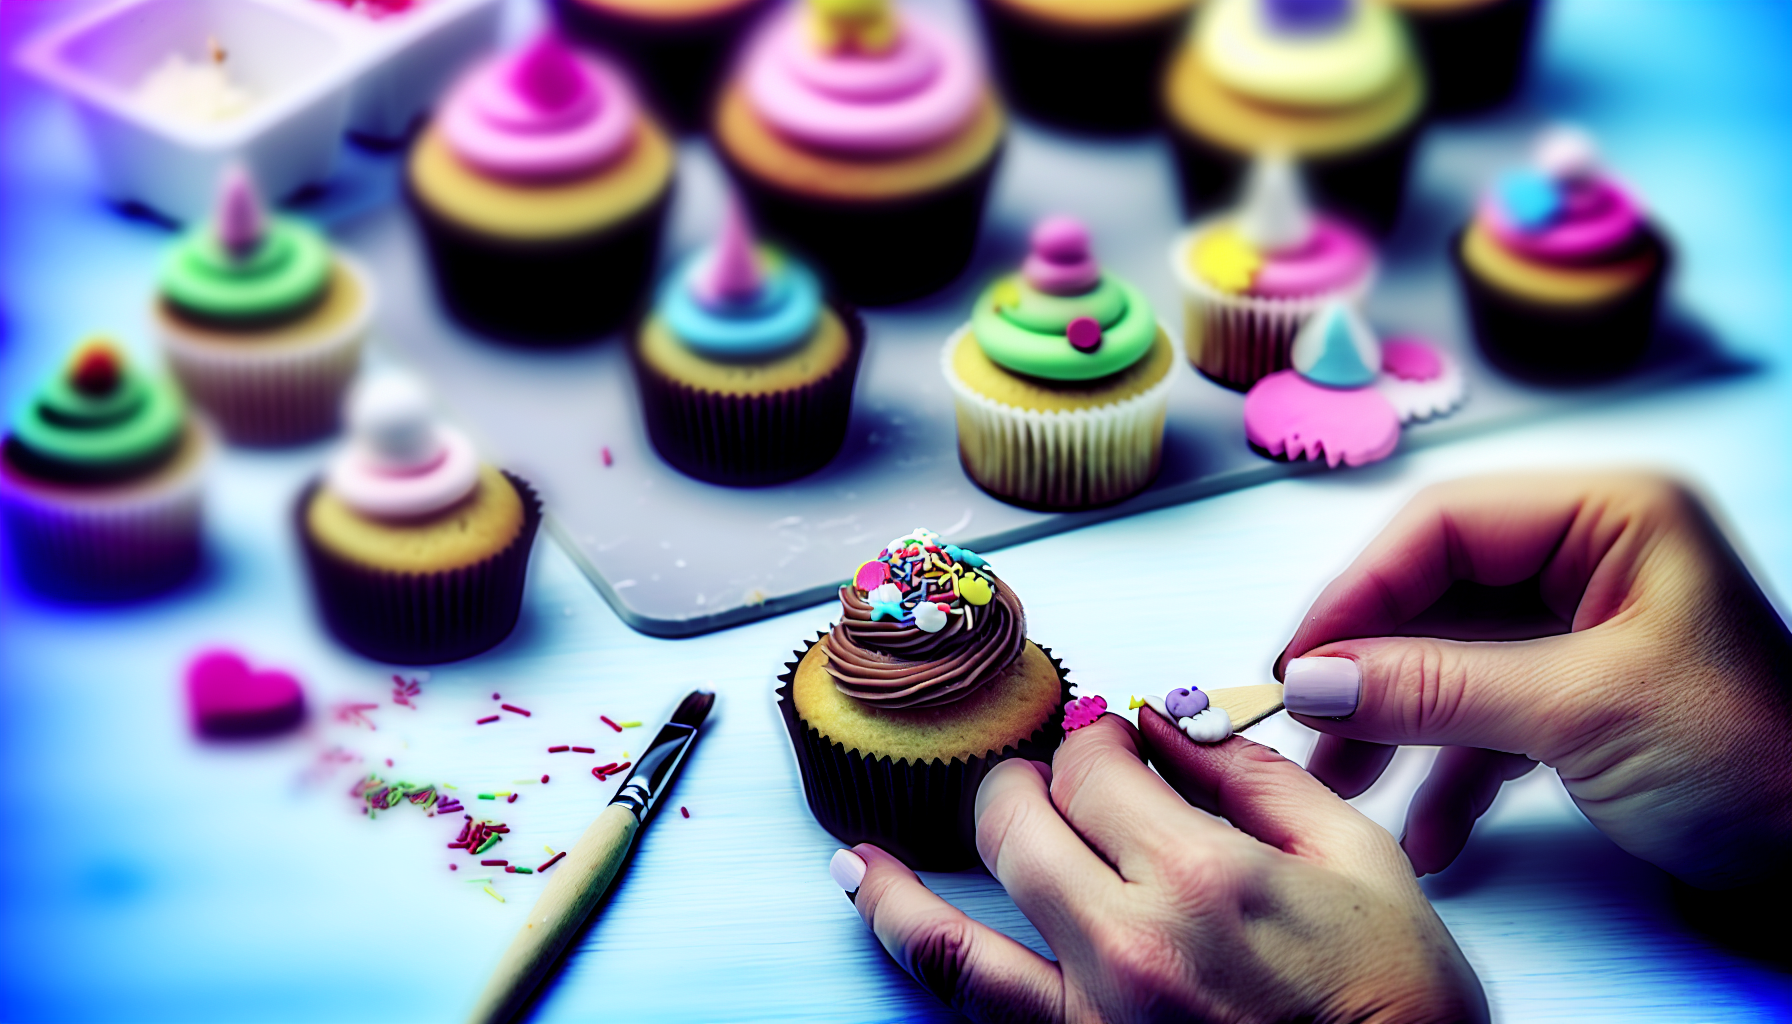
Essential Tools and Supplies for Cupcake Decorating
Before diving into decorating techniques, you’ll want to gather a few basic supplies. The good news is that you don’t need to invest in expensive equipment to get started.
Basic Decorating Kit
- Piping bags – Disposable plastic bags are perfect for beginners and make cleanup easy
- Piping tips – Start with a basic set that includes round, star, and petal tips
- Offset spatula – This angled tool makes frosting smooth and even
- Turntable – While not essential, it makes decorating much easier
- Couplers – Allow you to change piping tips without emptying the bag
Many of these items can be found at craft stores or online for very reasonable prices. As you develop your skills, you can gradually expand your collection with specialized tools.
Simple Frosting Techniques That Look Professional
Frosting is the foundation of cupcake decoration, and mastering a few basic application methods will open up countless creative possibilities.
The Classic Swirl
This timeless technique is easier than it looks. Fill your piping bag with buttercream frosting and fit it with a large star tip. Hold the bag at a 90-degree angle about half an inch above the cupcake center. Apply steady pressure while moving in a circular motion from the outside edge toward the center, then lift up quickly to create a peak. The result is an elegant spiral that looks bakery-perfect.
Rustic Spatula Spread
For a more casual, homemade aesthetic, use an offset spatula to create textured peaks. Scoop a generous amount of frosting onto the cupcake, then use the spatula to spread it outward and upward in random directions. Gently pull the spatula away to create natural-looking peaks and valleys. This technique is forgiving and works beautifully with cream cheese frosting or whipped ganache.
Two-Tone Frosting
Create visual interest by using two complementary frosting colors in one piping bag. Simply place two colors side by side in the bag before inserting the piping tip. When you pipe, both colors will emerge together, creating a beautiful striped or marbled effect. Try pairing pink and white for a romantic look, or orange and brown for autumn themes.
Creative Topping Ideas Using Everyday Ingredients
You don’t need specialty decorations to make cupcakes special. Your pantry and refrigerator likely contain plenty of items that can serve as beautiful, delicious toppings.
Fresh Fruit Arrangements
Berries, citrus slices, and edible flowers instantly elevate cupcakes with natural color and freshness. Try placing three raspberries in a cluster on vanilla frosting, or arrange thin lemon slices in an overlapping pattern. Blueberries can be grouped to create flower shapes, while strawberry halves make adorable hearts.
Cookie and Candy Crumbles
Crushed Oreos, graham crackers, or your favorite candy bars add texture and flavor contrast. For a cookies and cream theme, top chocolate frosting with Oreo crumbles. Crushed peppermint candies create a festive look for holiday cupcakes, while crumbled graham crackers paired with a toasted marshmallow create s’mores-inspired treats.
Nuts, Seeds, and Coconut
Toasted almonds, pecans, pistachios, or shredded coconut provide crunch and visual appeal. Lightly toast nuts before using them to enhance their flavor and color. Coconut can be toasted or tinted with food coloring to match your theme. These natural toppings work especially well with caramel, chocolate, or cream cheese frostings.
Theme-Based Decorating Ideas
Creating cupcakes around a specific theme helps guide your decorating choices and ensures a cohesive presentation.
Garden Party Cupcakes
Transform cupcakes into miniature gardens using green-tinted coconut as grass. Add gummy worms peeking out, or create flowers using M&Ms as petals with a yellow center. You can also pipe small buttercream flowers using a petal tip, arranging several on each cupcake to create a bouquet effect.
Ocean and Beach Themes
Blue frosting becomes the sea when you add crushed graham crackers as sand along one edge. Top with a small paper umbrella, candy shells, or gummy fish. For waves, use a fork to create textured lines in the frosting, then add white frosting peaks to represent whitecaps.
Seasonal Celebrations
Adapt your decorating to match the season. Spring calls for pastel colors and flower designs. Summer invites bright colors and fruit toppings. Autumn cupcakes shine with orange, brown, and yellow hues, topped with candy corn or cinnamon sugar. Winter designs can feature snowflakes piped in white frosting, or peppermint and chocolate combinations.
Easy Piping Designs for Beginners
Piping might seem advanced, but several beginner-friendly designs require only basic techniques and one or two tips.
Simple Rosettes
Using a star tip, pipe a small circle as your base, then pipe a second circle around it, and optionally a third outer circle. This creates a layered rosette that resembles a flower. You can make these as large or small as you like, and even create multiple small rosettes on a single cupcake.
Drop Flowers
With a flower tip held perpendicular to the cupcake surface, squeeze the piping bag briefly and then stop, lifting straight up. This creates a simple flower shape. Make several across the cupcake surface in a scattered pattern, adding a contrasting dot in the center of each for a complete look.
Dots and Pearls
The simplest piping technique is also one of the most versatile. Using a round tip, pipe dots of various sizes across the cupcake. Keep steady pressure for larger dots, lighter pressure for smaller ones. Arrange them in patterns, gradients, or random clusters. This technique works beautifully in metallic colors like gold or silver.
Using Fondant and Modeling Chocolate
While buttercream is the go-to frosting for most beginners, fondant and modeling chocolate offer different creative possibilities and aren’t as difficult to work with as you might think.
Simple Fondant Cutouts
Roll out store-bought fondant to about a quarter-inch thickness and use cookie cutters to create shapes. Hearts, stars, circles, and flowers are all easy options. Place these cutouts on top of frosted cupcakes for instant decoration. You can layer different colors or sizes for dimension.
Modeling Chocolate Shapes
Modeling chocolate is easier to work with than fondant and tastes better too. You can mold it into simple shapes like balls, logs, or bows. Create miniature roses by rolling small balls flat, then wrapping them around each other. Make cute animals by shaping basic spheres and adding details with a toothpick.
Common Decorating Mistakes and How to Avoid Them
Learning from common pitfalls will save you frustration and wasted ingredients as you develop your skills.
Frosting Too Soft or Too Stiff
Temperature matters tremendously when decorating. If your buttercream is too soft, it will slide off the cupcake or lose its shape. If too stiff, it will be difficult to pipe and may tear the cake. The ideal consistency is similar to toothpaste. If too soft, refrigerate for 10-15 minutes. If too stiff, let it sit at room temperature or add a teaspoon of milk.
Decorating Warm Cupcakes
Always allow cupcakes to cool completely before decorating. Warm cakes will melt your frosting, creating a mess instead of a masterpiece. If you’re short on time, place cooled cupcakes in the refrigerator for 20-30 minutes before frosting.
Overfilling Piping Bags
Fill piping bags only halfway to maintain control. Overfilled bags are difficult to manage and often burst or leak from the top. This creates mess and wastes frosting. For better control, fold down the top of the bag like a cuff before filling.
Color Theory for Beautiful Cupcakes
Understanding basic color combinations will help you create visually appealing cupcakes that look coordinated and intentional.
Complementary Colors
Colors opposite each other on the color wheel create striking contrast. Try pairing purple frosting with yellow accents, or orange frosting with blue toppings. These combinations are bold and eye-catching, perfect for celebrations.
Analogous Colors
Colors next to each other on the wheel create harmonious, pleasing combinations. Think blue, blue-green, and green, or red, orange, and yellow. These schemes feel natural and coordinated without being boring.
Monochromatic Schemes
Using different shades of the same color creates sophisticated, elegant cupcakes. Try light pink frosting with darker pink accents and deep rose decorations. This approach works beautifully for weddings, showers, and upscale events.
No-Piping Decoration Methods
Not everyone wants to invest in piping equipment, and that’s perfectly fine. Beautiful cupcakes can be created without any piping at all.
Dip and Roll Technique
Frost cupcakes with a simple spread of frosting, then while still sticky, dip the top into a bowl of sprinkles, chopped nuts, coconut, or cookie crumbles. The topping adheres to the frosting, creating complete coverage and a professional look with minimal effort.
Stencil Designs
Place a paper stencil or doily over a frosted cupcake and dust with cocoa powder, powdered sugar, or colored sanding sugar. Carefully remove the stencil to reveal a beautiful pattern. This technique works especially well on smooth, light-colored frostings.
Drizzle Patterns
Thin out chocolate, caramel, or colored frosting with a small amount of milk or cream. Load it into a squeeze bottle or spoon, then drizzle over cupcakes in random or geometric patterns. This creates an artsy, modern look with very little skill required.
Making Your Cupcakes Instagram-Worthy
Once you’ve created beautiful cupcakes, you’ll want to showcase them properly, whether for social media or simply to preserve the memory.
Natural lighting is your best friend when photographing cupcakes. Position them near a window during daylight hours, avoiding direct harsh sunlight. Arrange multiple cupcakes on a cake stand or decorative plate rather than photographing just one. Include props like fresh flowers, colorful napkins, or themed decorations that complement but don’t overwhelm your creations. Shoot from slightly above at a 45-degree angle to capture both the top decoration and the cupcake’s shape.
Practicing and Developing Your Skills
Like any craft, cupcake decorating improves with practice. Don’t be discouraged if your first attempts don’t match your vision.
Start by practicing piping techniques on parchment paper or a plate before working on actual cupcakes. This allows you to get comfortable with pressure control and hand movements without wasting cupcakes. Watch video tutorials to see techniques in action, as movement is often easier to learn visually than through written instructions alone. Join online baking communities where you can share your work, ask questions, and get inspired by others at various skill levels.
Set small goals for yourself. Perhaps master one new technique each week, or challenge yourself to create a dozen cupcakes using only three colors. These focused practice sessions build skills faster than randomly trying different techniques.
Conclusion
Cupcake decorating is a delightful creative outlet that combines artistry with delicious results. By starting with these beginner-friendly techniques and gradually building your skills, you’ll soon be creating impressive cupcakes for any occasion. Remember that even simple decorations can look stunning when executed with care, and that every baker started exactly where you are now. Grab your piping bag, choose a technique that excites you, and start creating your own edible masterpieces today.
Leave a Reply